Quickstart guide#
This quickstart guide is intended to help you create an Anaconda account, obtain conda software, and configure it to access your instance of Anaconda.
Creating an account#
Go to https://anaconda.cloud/sign-up.
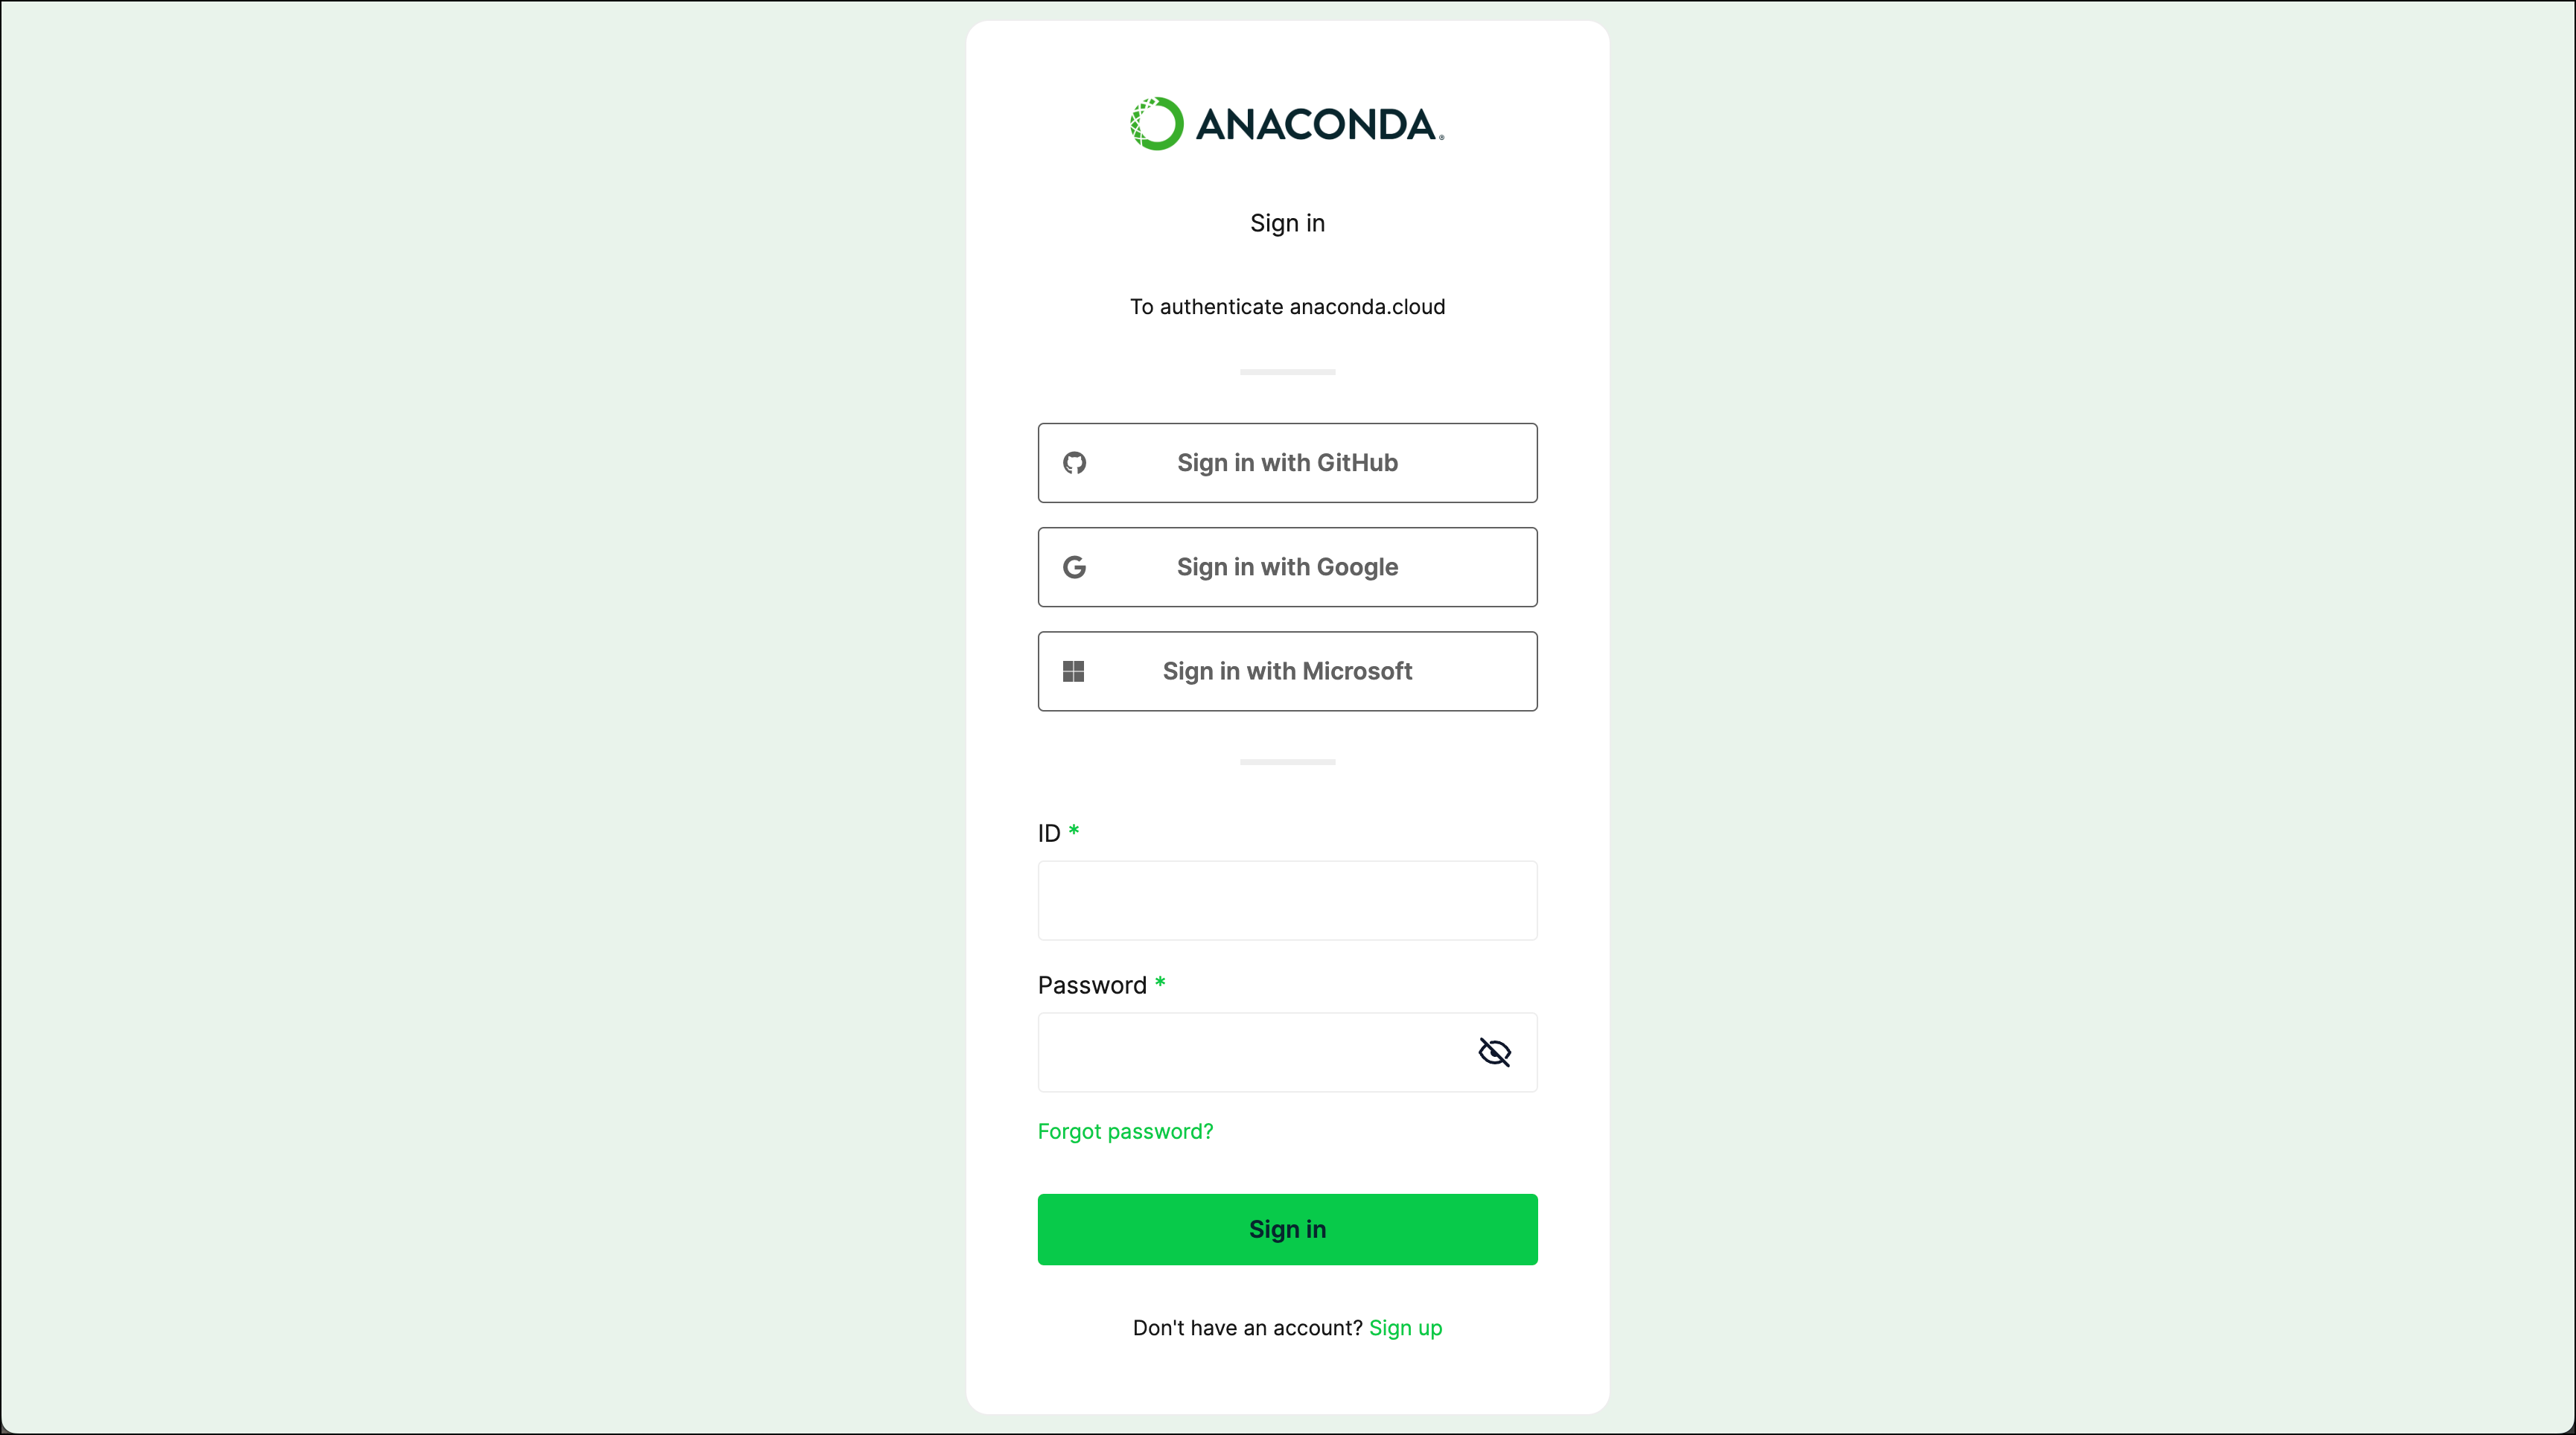
From here you have several options for account registration:
Sign up manually with an email and password
Authenticate with a GitHub, Gmail, or Microsoft account
Signing up manually#
Click Sign Up with Email.
Enter your name, email address, and password.
Check your email for the verification email.
Click the verification link in your email to complete account verification.
Subscribing to Anaconda#
For information and help with managing subscriptions, see Subscriptions.
Installing Anaconda software#
Installing conda#
You can obtain conda by installing either Anaconda Distribution or Miniconda. If you already have conda installed, skip ahead to Installing Anaconda Navigator.
If you do not have conda installed, download either Anaconda Distribution or Miniconda and install it on your system before proceeding. If you’re unsure which to download, refer to our Getting Started with Anaconda topic for guidance.
Installing conda-token#
The conda-token tool is used to authenticate your Anaconda Cloud organization access token and configure the default_channels: in your .condarc file to use Anaconda’s private repository channels. For more information, see :doc:` Channels <channels>`.
Open Anaconda Prompt (Terminal on macOS/Linux).
Install
conda-tokenby running the following command:conda install conda-token --channel https://repo.anaconda.cloud/repo/anaconda-tools --name base
Enter
ywhen prompted to proceed with the installation.
Authenticating to Anaconda#
Anaconda uses private tokens to authenticate users to their organizations. You must be assigned a seat within an organization to activate a token. Once you’re assigned a seat, you can generate a private token for yourself at any time.
Go to your organization’s page.
Select Token Access from the left-hand navigation.
Select Activate token if it is the first time you are receiving a token, or Reissue token if you are obtaining a new token. An automated email containing a private token will be delivered to the address associated with your Anaconda account.
Copy the private token you received in your email and set it in either Navigator or the CLI:
Launch Anaconda Navigator.
Select Connect, then Sign in to Anaconda Professional.
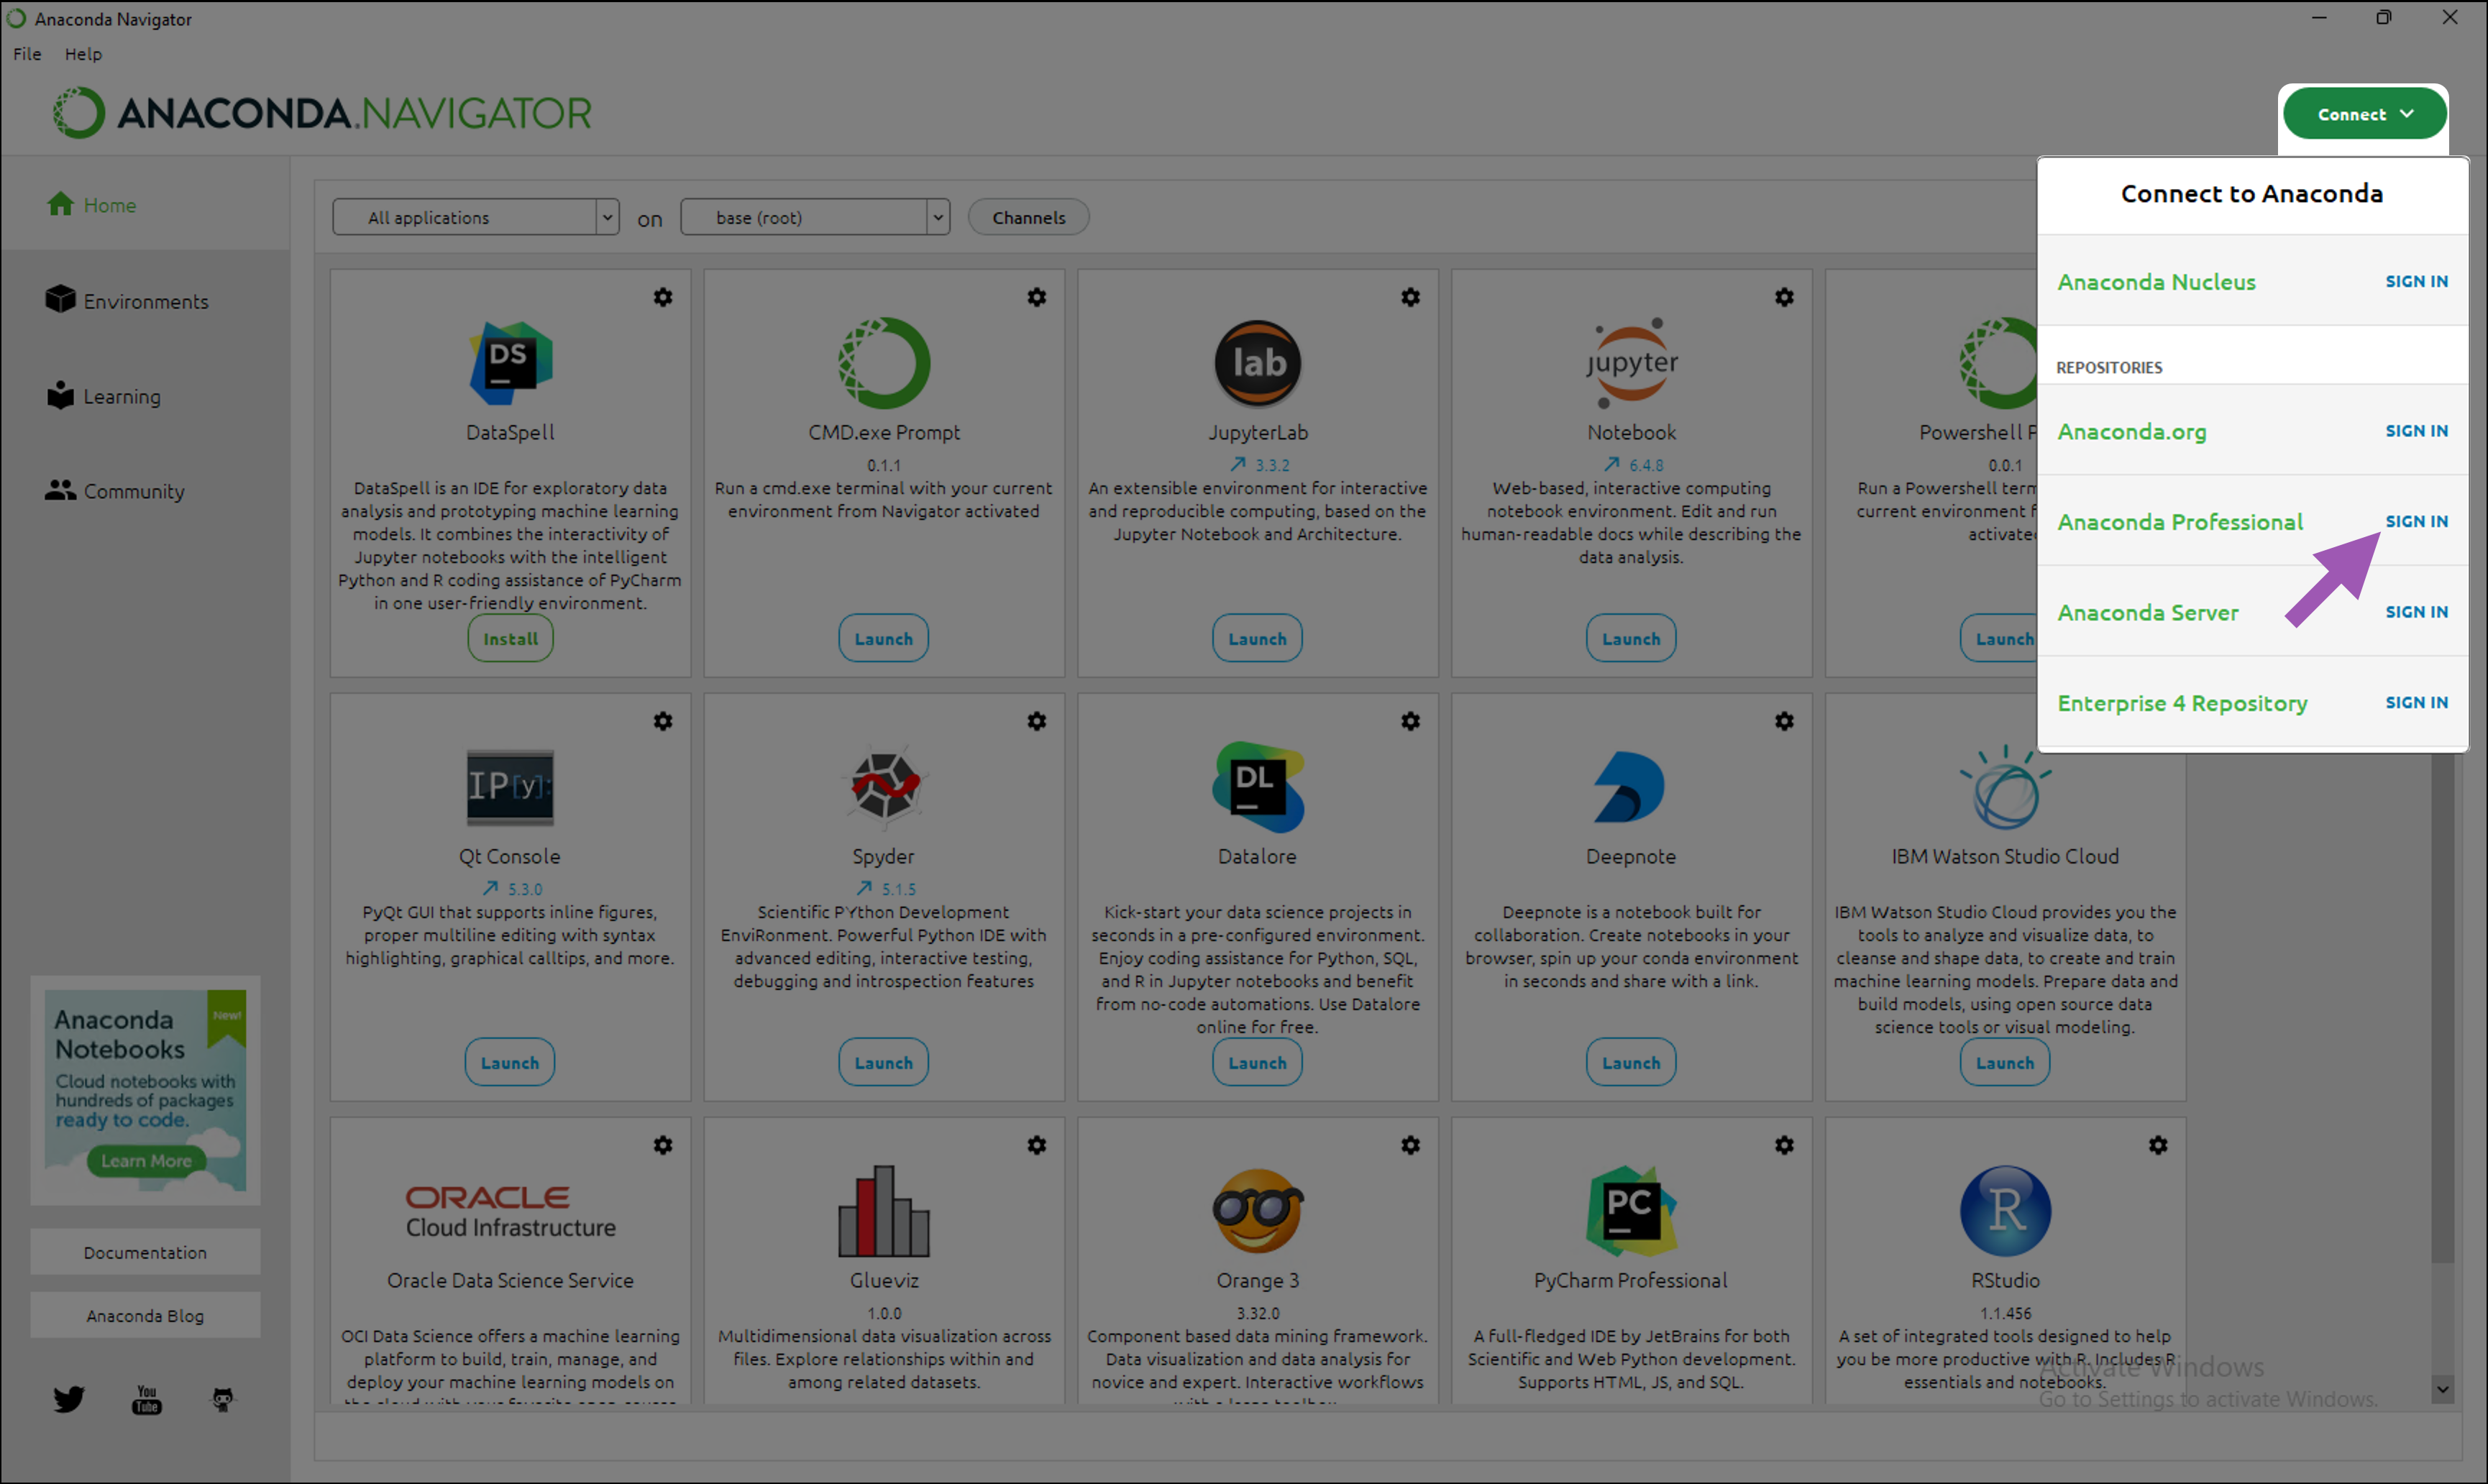
Note
Both the Pro (legacy) and Business tiers share a repository of curated packages. Therefore, signing into Anaconda Professional gives you access to the Package Security Manager channels you need, as long as you have the correct access token.
Paste the token, then click Set token.
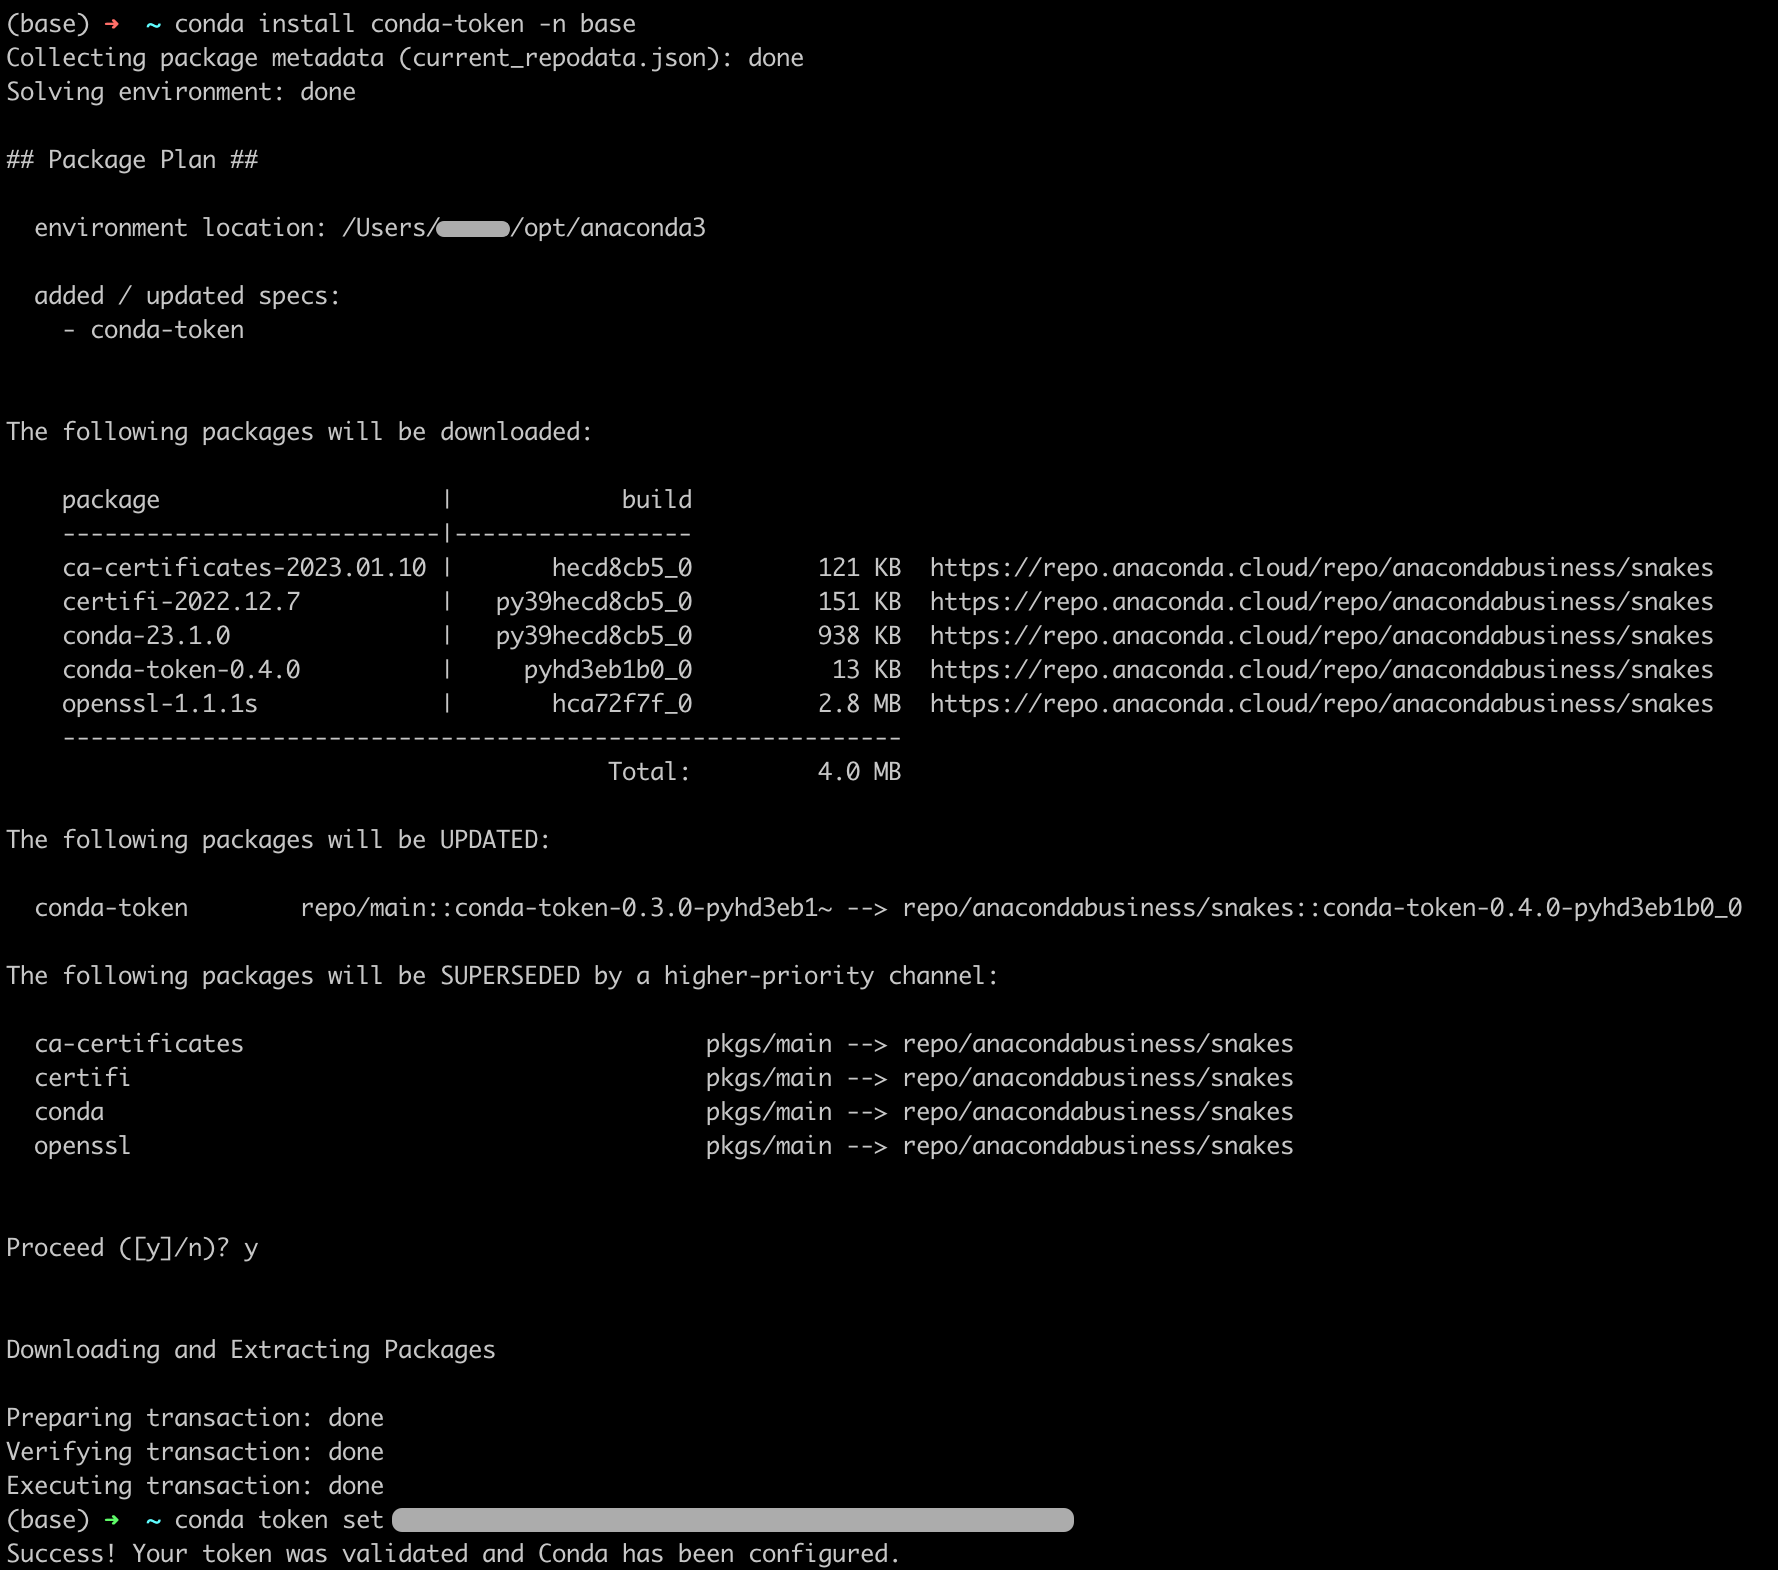
Configure conda to use this token by running the following command:
# Replace <TOKEN> with the token you received in your email
conda token set <TOKEN>
Caution
You must run this command every time you receive a new token.
Here is an example of what your terminal will display when you set your token correctly:
Important information about the .condarc file#
The .condarc file is a configuration file that tells conda where to look for packages. Here is an example of what your .condarc file might look like:
channels:
  - https://repo.anaconda.cloud/repo/<ORG_ID>/<CHANNEL_NAME> # Business tier only
  - defaults
add_anaconda_token: true
restore_free_channel: false
default_channels:
  - https://repo.anaconda.cloud/repo/main
  - https://repo.anaconda.cloud/repo/r
  - https://repo.anaconda.cloud/repo/msys2
Conda searches for requested packages in the channel listed at the top of the channels: list first. If that channel contains the requested package, it is downloaded from that channel.
If the requested package is not located in that channel, conda will search for the package in the next entry of the channels: list.
When conda reaches the defaults entry of the channels: list, it searches the channels listed under the default_channels: list, in the same descending order.
In this example for Business tier, conda will look for a requested package in your organization’s channel first, then will look in the default channels in listed order, starting with https://repo.anaconda.cloud/repo/main, then https://repo.anaconda.cloud/repo/r, and finally, in https://repo.anaconda.cloud/repo/msys2.
For Pro tier (legacy), conda will look in the default channels in listed order, starting with https://repo.anaconda.cloud/repo/main, then https://repo.anaconda.cloud/repo/r, and finally, in https://repo.anaconda.cloud/repo/msys2.
For more information regarding the .condarc file, see the official conda documentation.
Viewing your .condarc file#
You can view and edit your .condarc file in either Navigator or the CLI:
In Anaconda Navigator, navigate to Preferences from the menu bar and select Configure Conda.
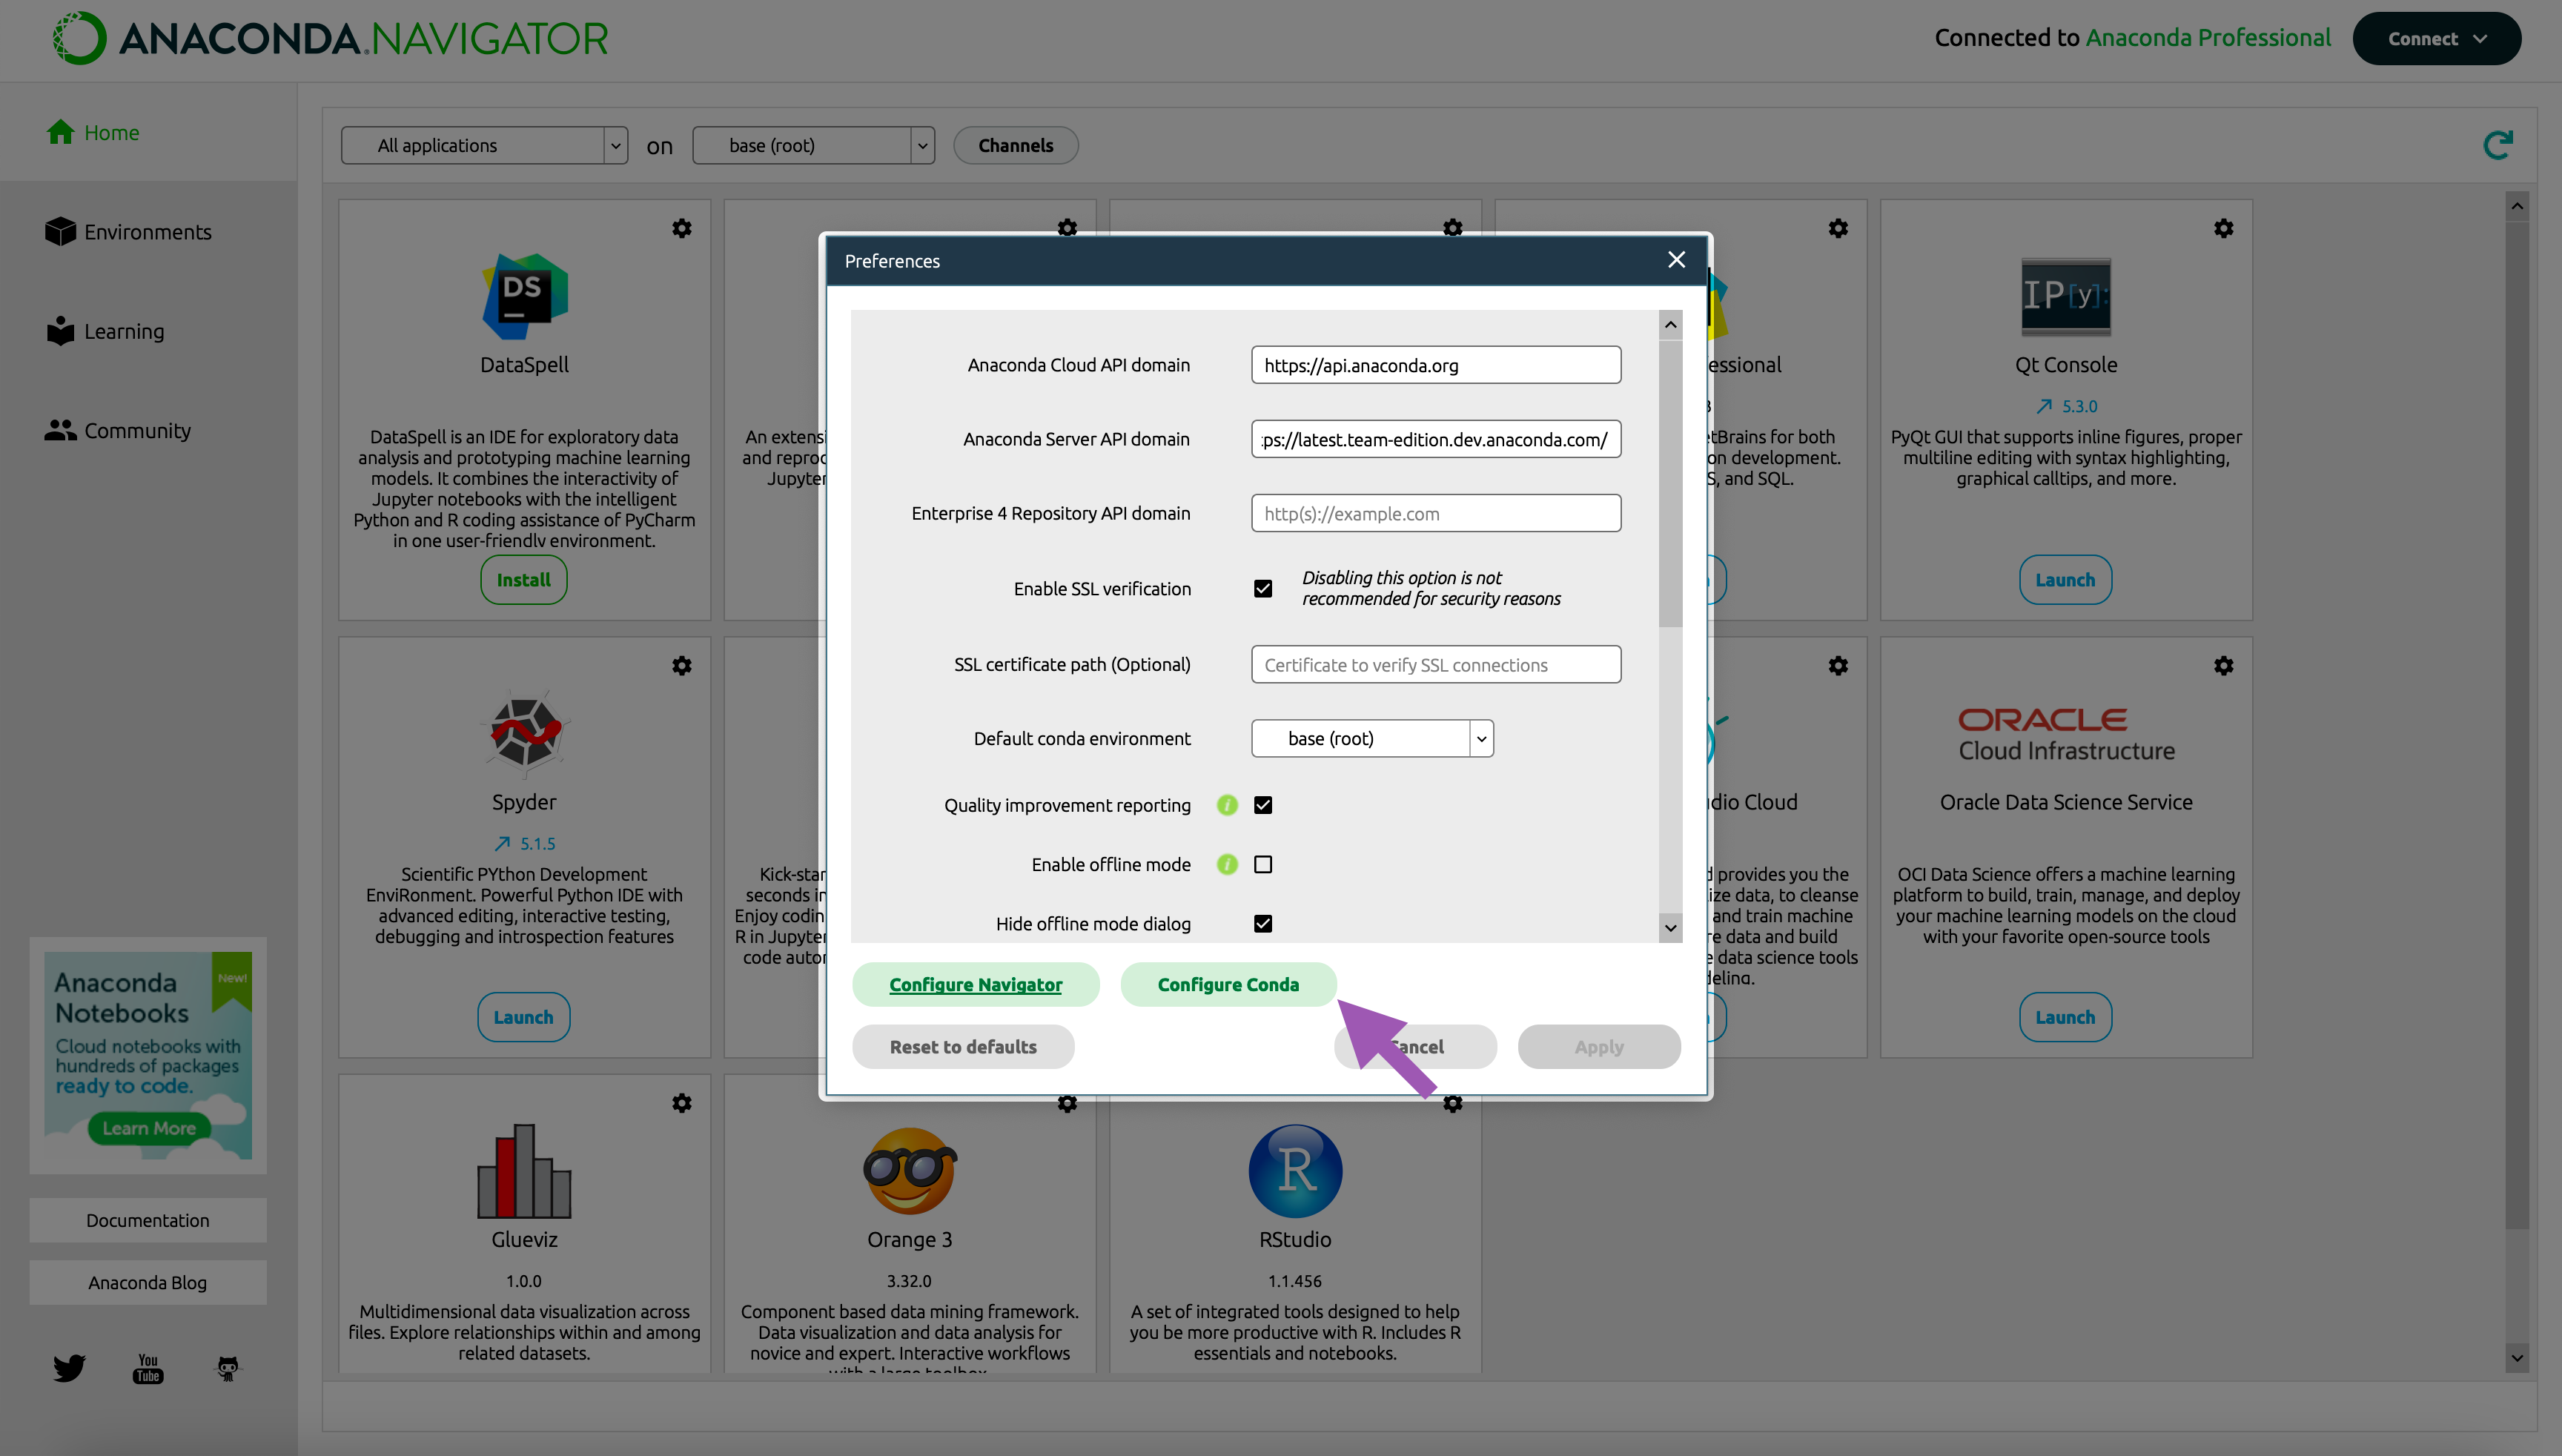
Note
You can edit the .condarc file directly from this view.
Run the following command in the terminal:
cat .condarc
Adding an organization channel to your .condarc file#
Note
This section applies to Business tier only.
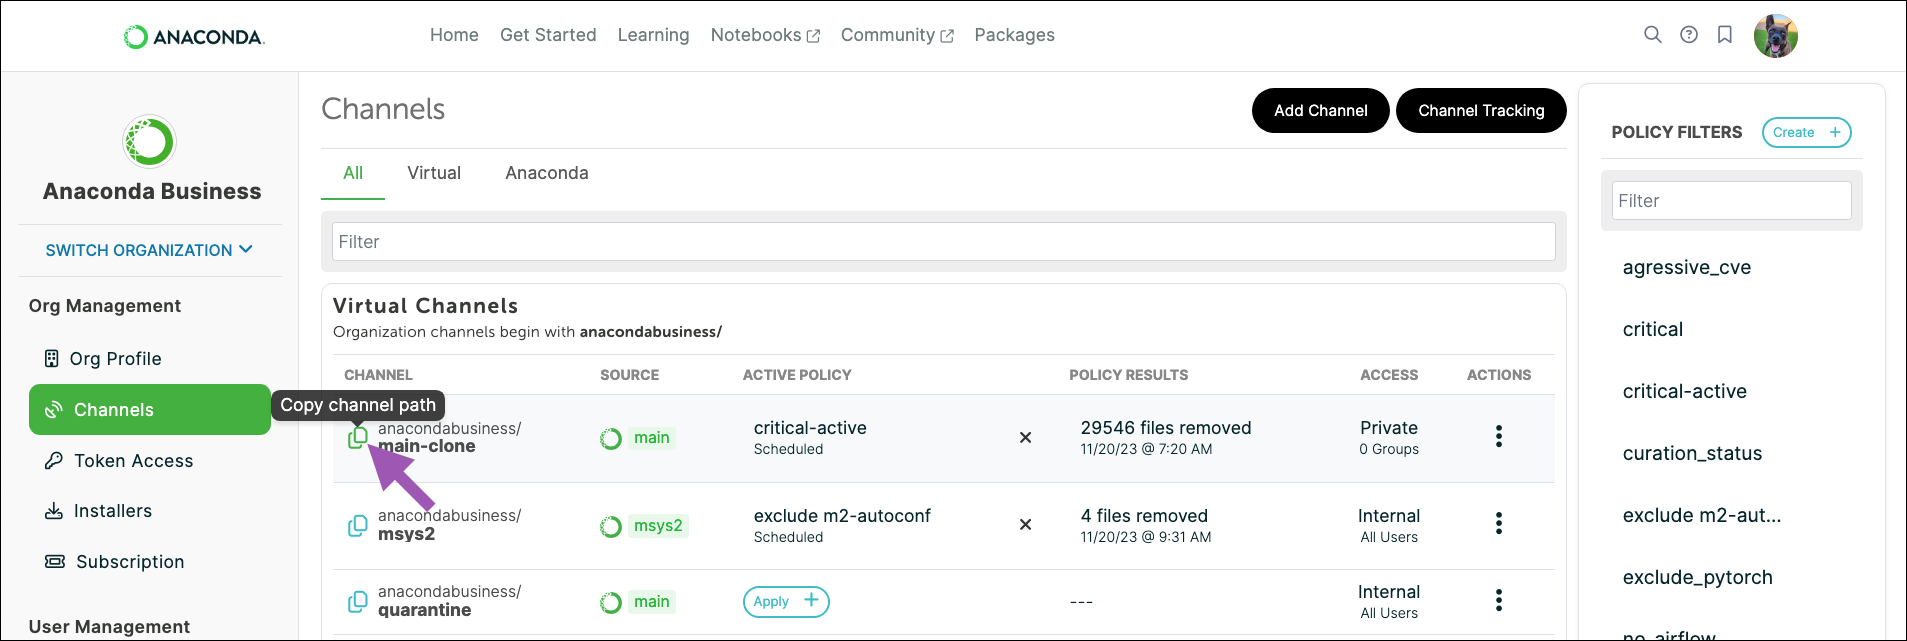
Go to your organization’s page.
Select your organization.
Select Channels from the left-hand navigation.
Select copy channel path.
Open your terminal and run the following command:
# Replace <CHANNEL_PATH> with the copied channel path
conda config --prepend channels <CHANNEL_PATH>
Adding conda-forge as a channel#
If you need to install packages from the conda-forge repository, you can do so in either Navigator or the CLI:
Select Channels, then click Add….
Enter
conda-forgeas your channel.Press Enter (Windows)/Return (Mac) to add the channel.
Click Update channels to instruct navigator to update the
channels:list in your.condarcfile.
Run the following command in the terminal:
conda config --append channels conda-forge
Using Anaconda behind a firewall or proxy (Optional)#
Some companies have security policies that prevent communications on their network with external servers like Anaconda. Under these circumstances, you’ll need to connect to your company’s firewall/proxy server in order to download packages successfully.
To connect to a firewall/proxy server, you’ll need to include a proxy_servers: section in the .condarc file that contains the URL to the proxy server. This entry must also contain a username and password for logging in to the proxy server. Speak with your IT Administrator if you do not have this information.
There are no commands to include this portion of the .condarc file, so you need to manually include the following lines:
Caution
If your password contains special characters, you’ll need to escape them using percent encoding as described here.
# Replace <USERNAME> with the username for your proxy server
# Replace <PASSWORD> with the password for your proxy server
# Replace <URL> with the URL to your proxy server
proxy_servers:
 http: http://<USERNAME>:<PASSWORD>@<URL>:8080
 https: https://<USERNAME>:<PASSWORD>@<URL>:8443
You’ll also need to work with your IT team to allowlist connections to the main package repositories once you’ve configured your connection to the firewall/proxy server. The main package repositories are:
https://anaconda.org
https://repo.anaconda.com
https://repo.anaconda.cloud
In some situations, it is necessary to export the HTTP_PROXY and HTTPS_PROXY environment variables to utilize the proxy server. To export your environment variables, open a terminal and run the following commands:
# Replace <USERNAME> with the username for your proxy server
# Replace <PASSWORD> with the password for your proxy server
# Replace <URL> with the URL to your proxy server
export HTTP_PROXY=http://<USERNAME>:<PASSWORD>@<URL>:8080
export HTTPS_PROXY=https://<USERNAME>:<PASSWORD>@<URL>:8443
For more information about using conda behind a proxy server, see Configure conda for use behind a proxy server.
Enabling environment management#
Administrators can enhance organizational security by requiring members to log their local conda environments with the organization. Environments that are logged with an organization can be monitored, scanned, and blocked from use if a vulnerability is discovered. For more information about logging, scanning, and managing environments, see Environments.
Note
Implementing environment logging requires coordination at the organizational level.
Prerequisites#
Environment logging and scanning requires the following:
Python 3.10 or later in your
(base)environmentVerifying Python in your
(base)environmentCheck to see which Python version you have in
(base)by opening Anaconda Prompt (Terminal for macOS/Linux) and running the following command:python --version
The output of the command might look something similar to this:

If you need to upgrade Python, run the following command:
conda update --name base python
Caution
Updating Python in your
(base)environment can affect other installed packages. Review the proposed changes carefully before proceeding.
Installing required plugins#
Environment logging and scanning requires the installation of a few plugins in your (base) environment that expand the functionality of conda.
Obtain the necessary plugins by installing the anaconda-env-manager “metapackage” (which contains all of the plugins listed below). To install anaconda-env-manager, run the following command:
conda install --name base anaconda-cloud::anaconda-env-manager
Plugins provided by the anaconda-env-manager metapackage
The following plugins extend the functionality of your installation of conda:
anaconda-env-log- Automatically logs the current state of an environment whenever a user performs acreate,install,remove,rename, orupdateaction with conda (manual logging of existing environments is also supported).
anaconda-activate-check- Provides checks that validate environments against administrator-defined security controls before activation and notifies users of warnings or access restrictions with guidance for resolution.
anaconda-audit- Allows you to scan local environments to assess the security impact of actions like installing or updating packages, so you can proactively address potential issues without requiring administrator intervention. It also serves as a valuable tool for identifying issues when troubleshooting security concerns flagged by administrators.Note
Once you’ve installed
anaconda-env-manager, it is a good idea to keep it updated by runningconda update anaconda-env-managerperiodically.
Registering your organization#
To ensure your environments are properly logged to your organization on Anaconda Cloud, you must log in via the CLI and register your organization with conda. To register your organization:
Open Anaconda Prompt (Terminal on macOS/Linux).
Log in to Anaconda Cloud by running the following command:
anaconda login --at cloud
You will be prompted for your username and password. Enter your Anaconda Cloud credentials and complete the login process in the browser window that opens.
After successfully logging in, return to the command line and register your organization by running the following command:
# Replace <ORG_ID> with your ORG_ID (found in your organization's URL —
# https://anaconda.cloud/organizations/<ORG_ID>)
conda env-log register --organization-name <ORG_ID>
With the organization registered (and anaconda-env-log installed in the (base) environment), newly created environments are logged to the registered organization.
Verifying your configurations#
Test your configurations and verify that conda downloads packages from the desired channel in either Navigator or the CLI:
Go to Environments in the left-hand navigation, then select Create at the bottom of the window.

Enter a name for your environment and select a version of Python (3.11 is preferred) from the dropdown menu, then click Create.
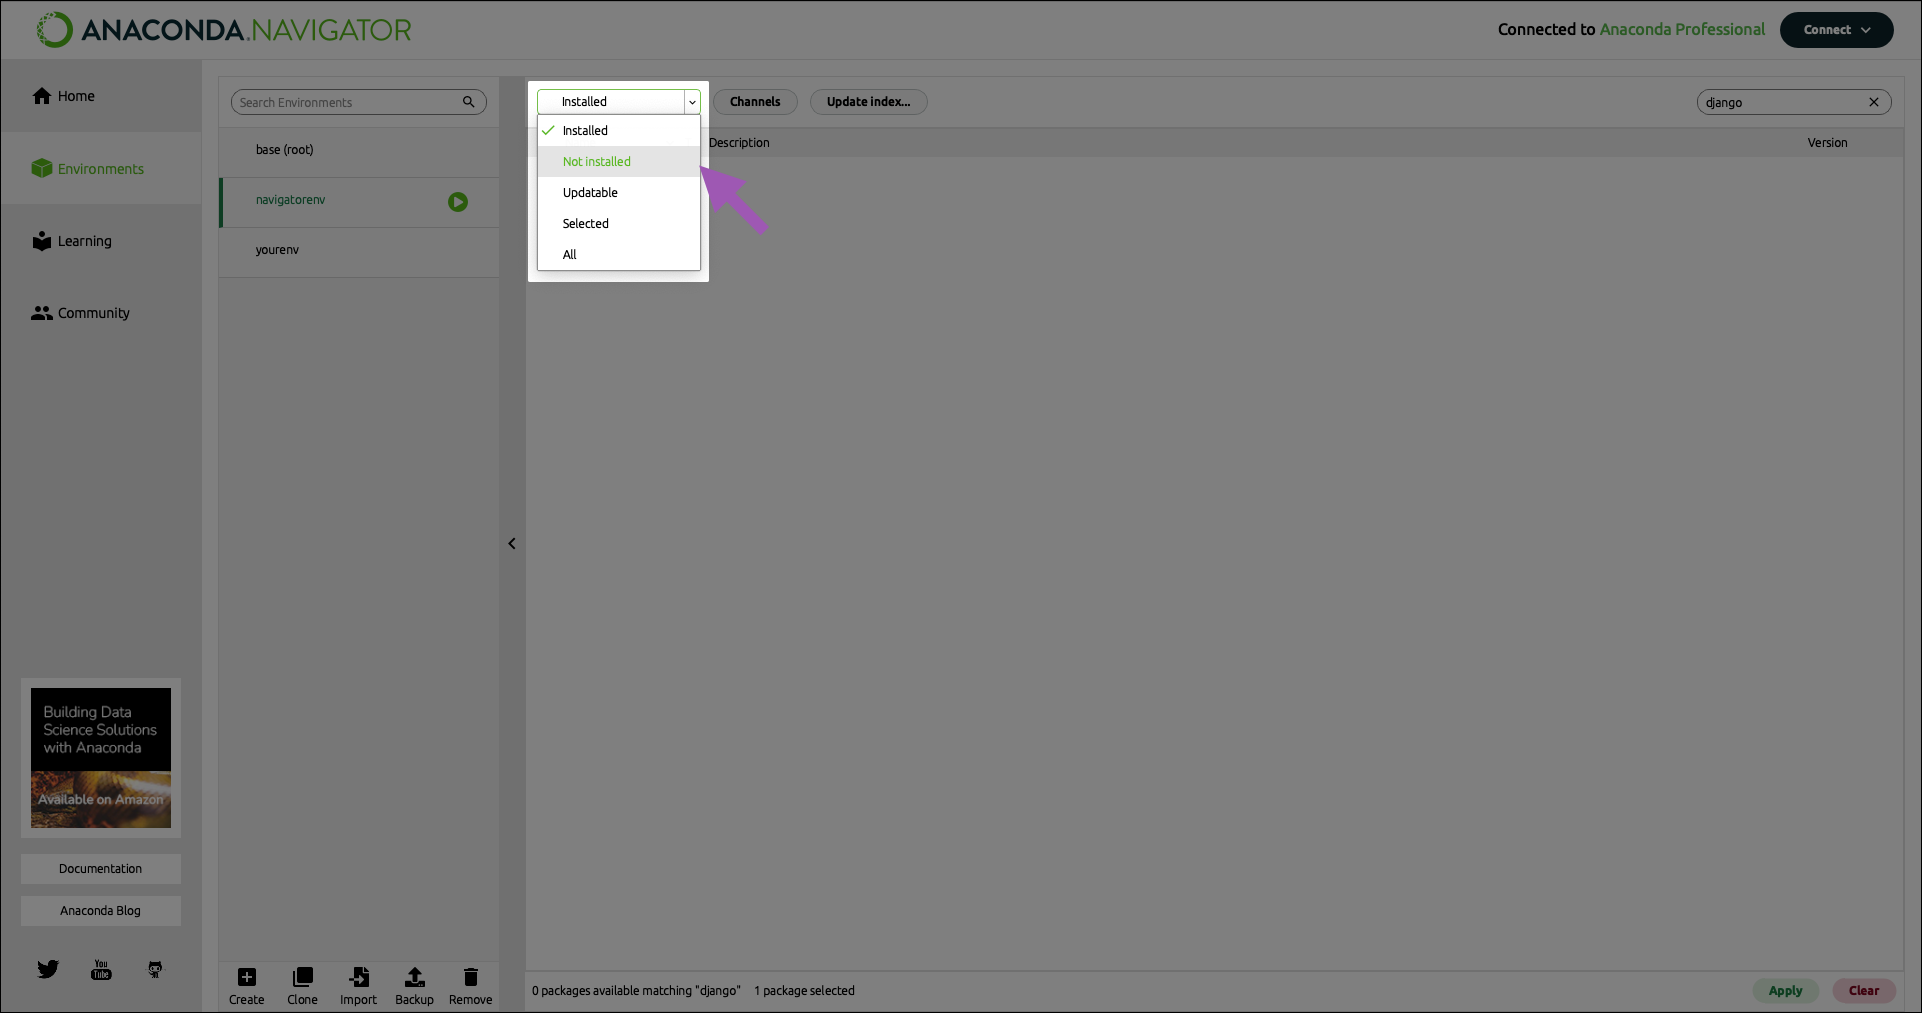
Change the package selector to Not installed. This will show you packages that are available from your channel but are not installed on your machine.
If you know the name of the package you need, you can enter it in the search bar to locate the package. Select a package to download and click Apply.
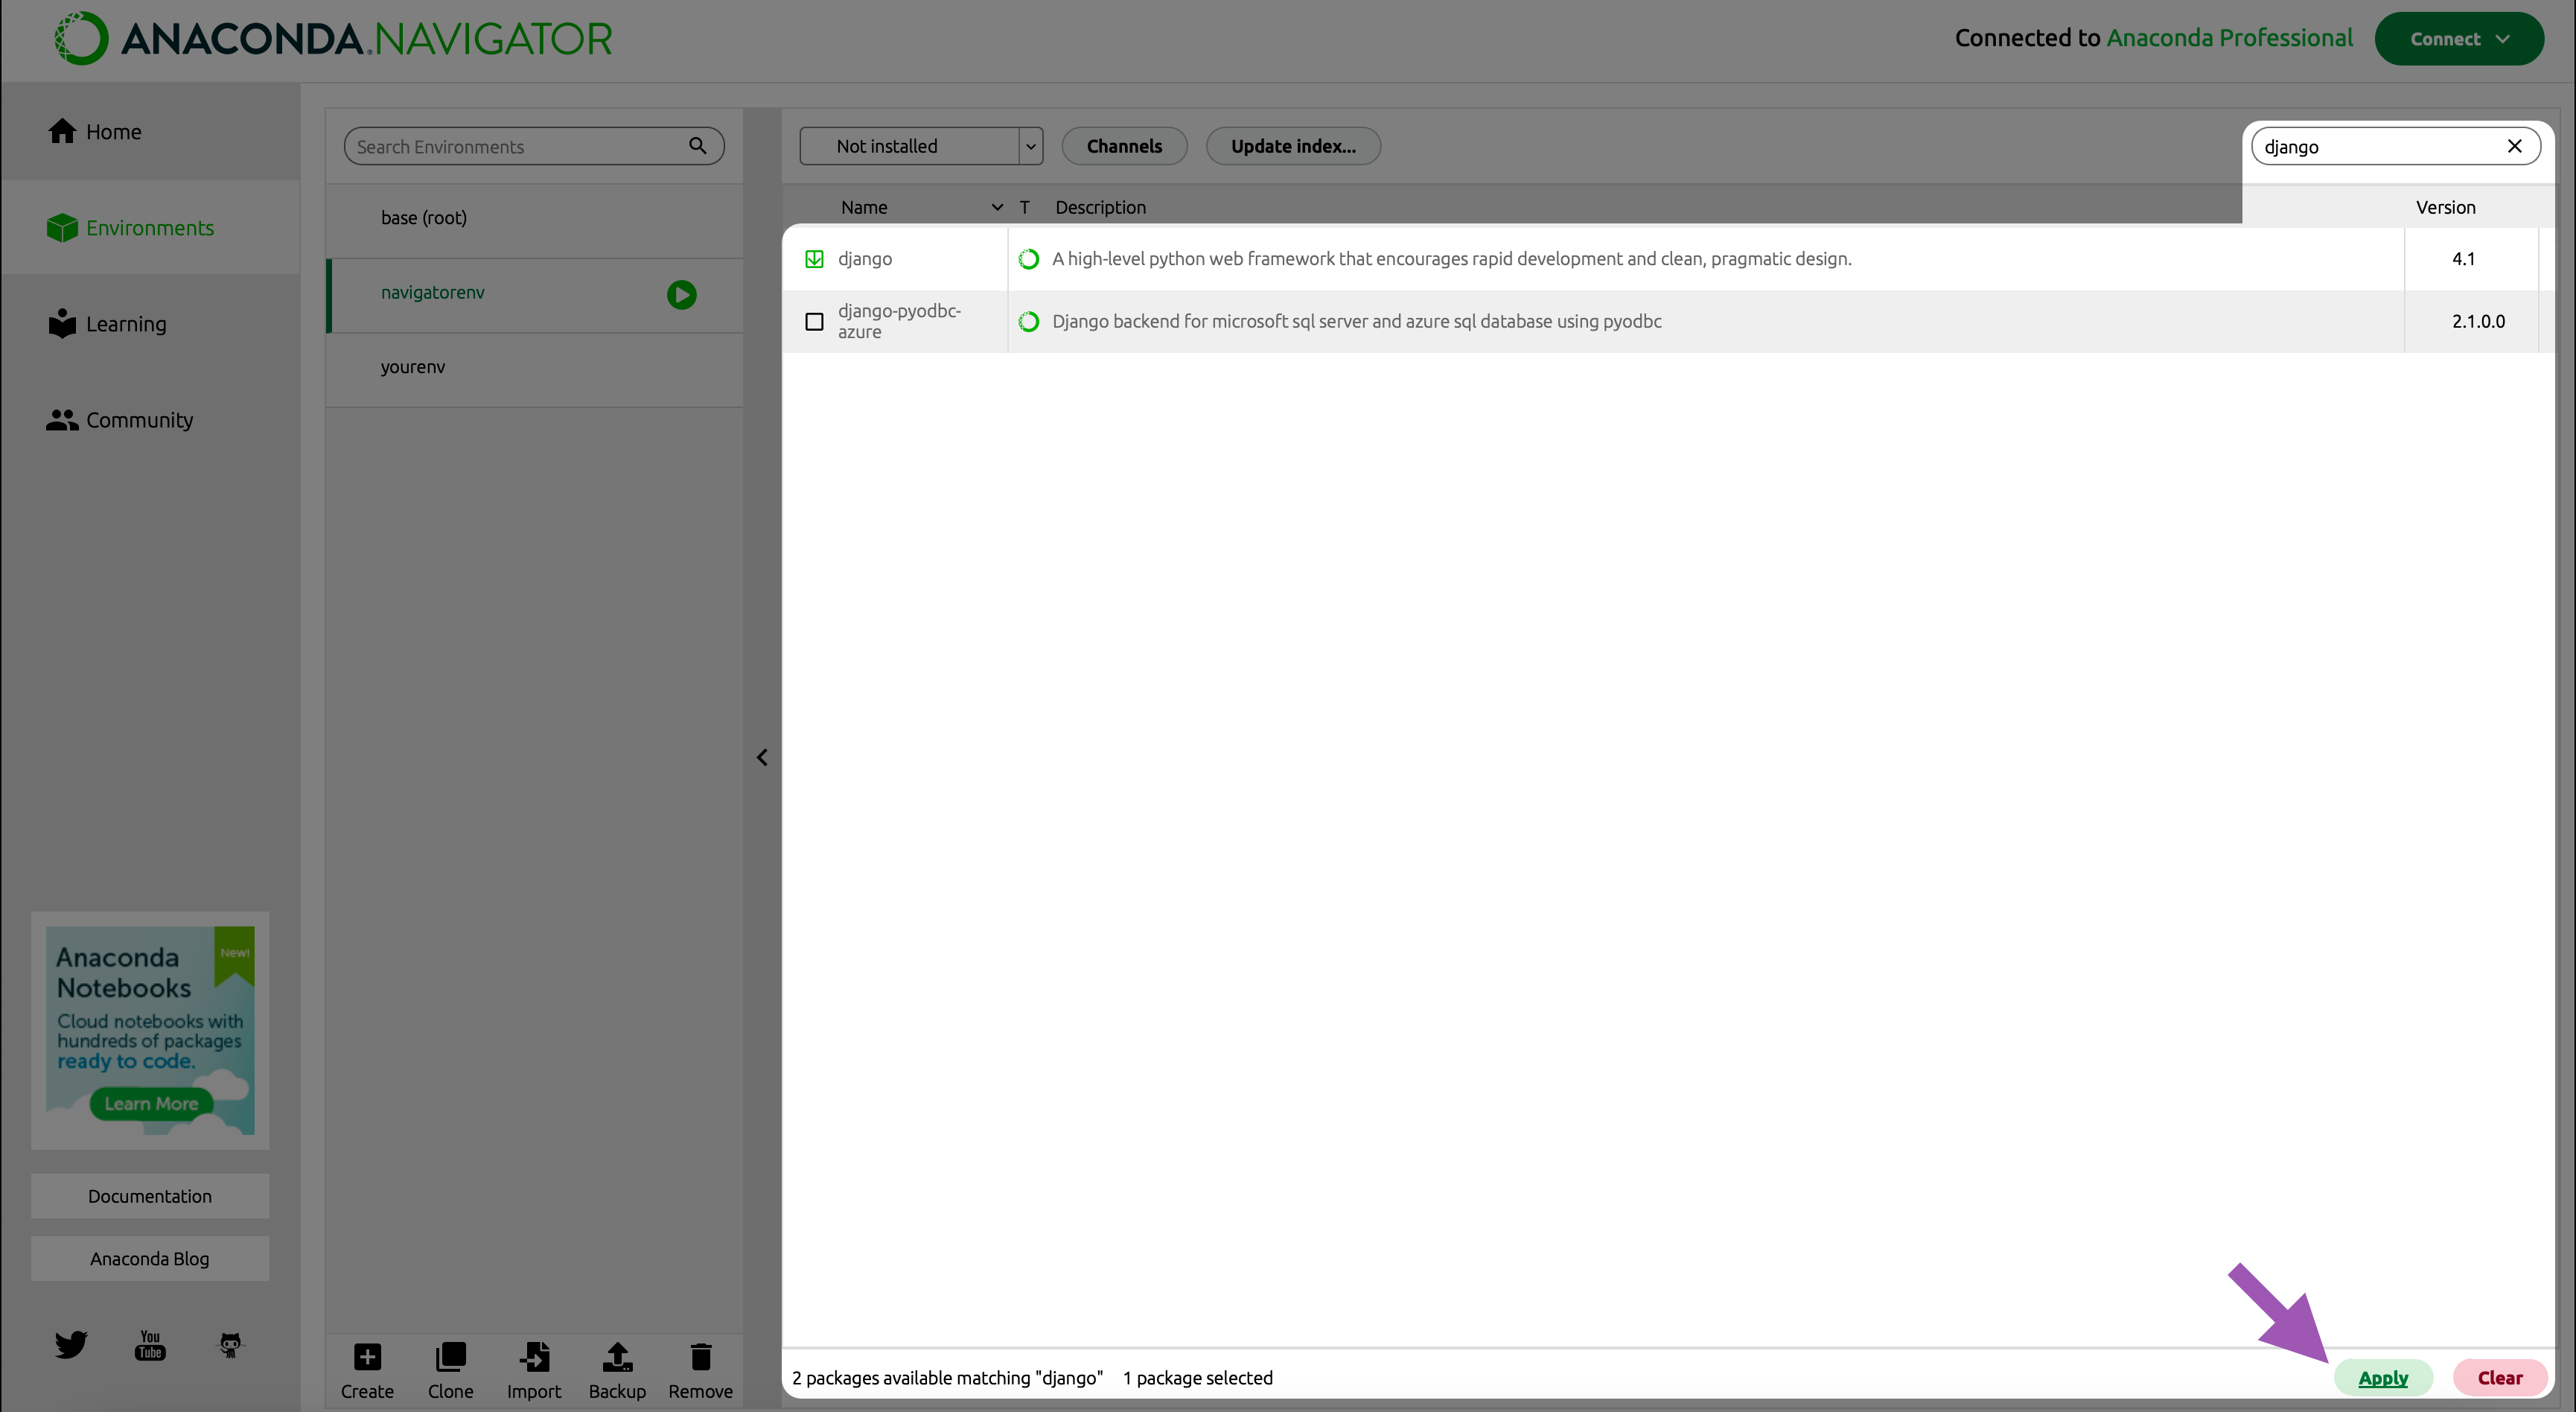
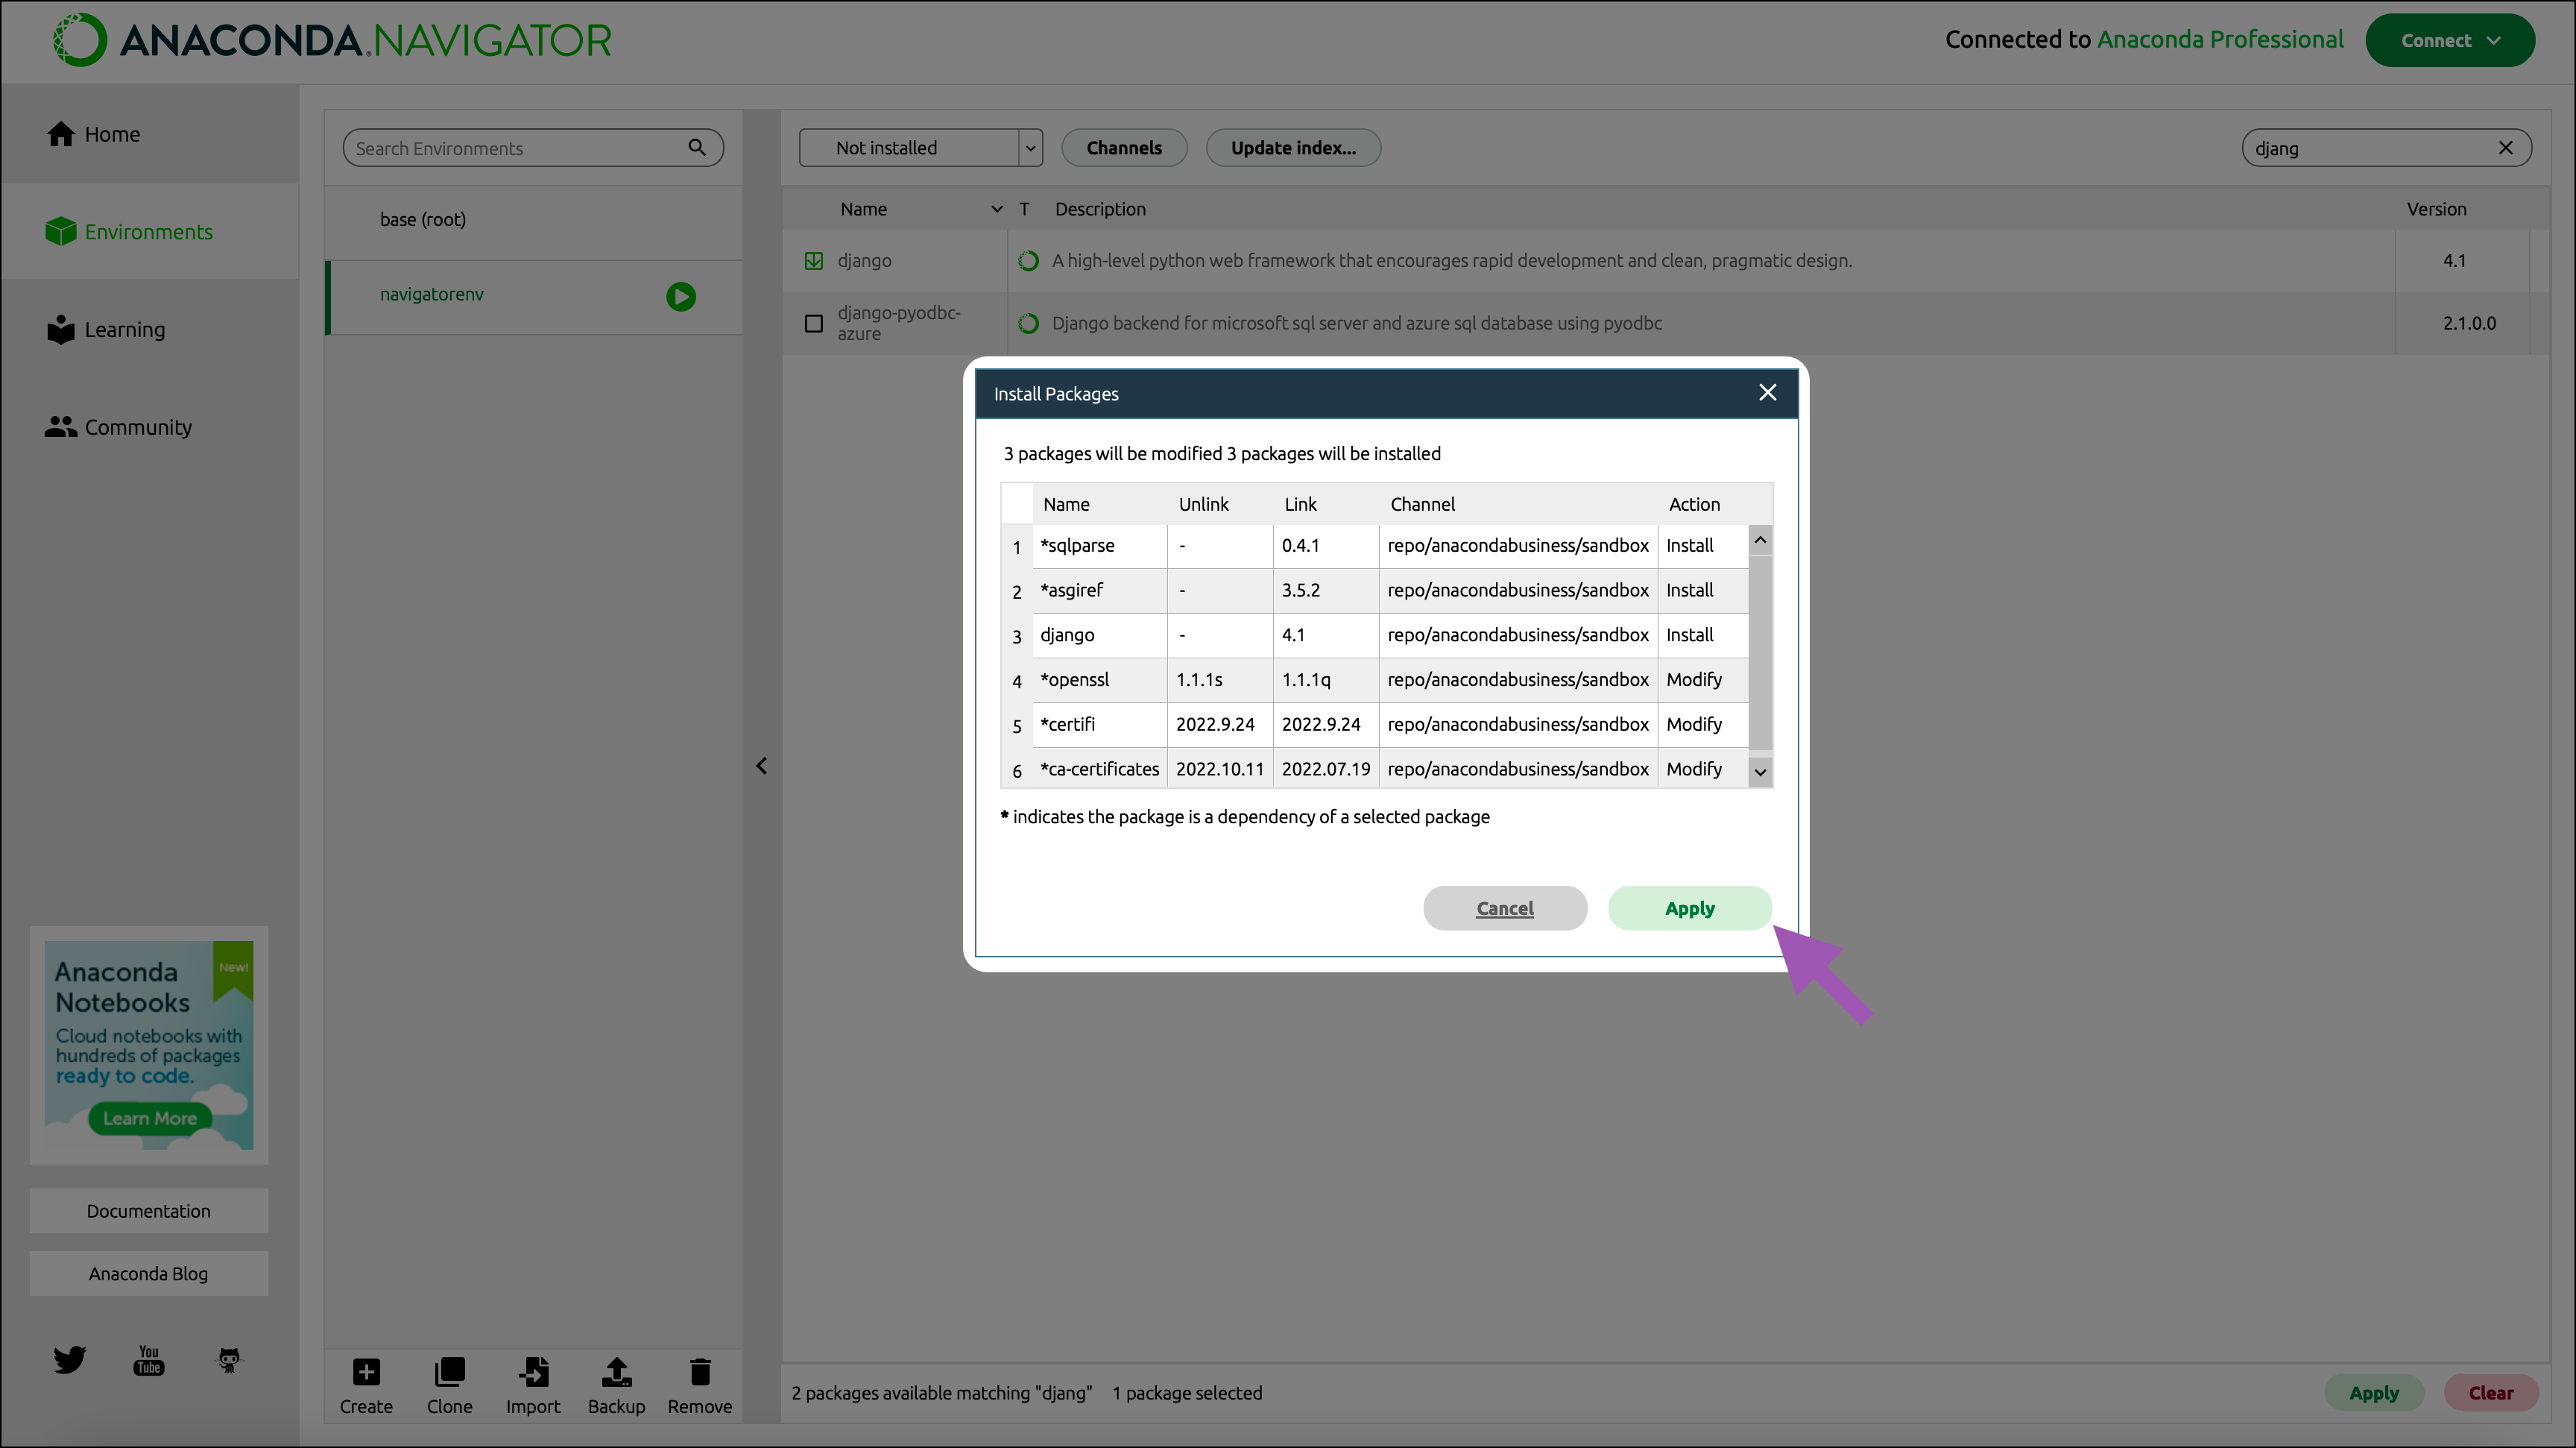
Click Apply to install the selected packages (and their dependencies).
Note
The Channel column will display your organization’s channel path, if correctly configured.
Create an environment by running the following command:
# Replace <ENV_NAME> with a name for your environment
conda create --name <ENV_NAME>
Verify your environment created successfully by running the following command:
conda env list
Activate your environment by running the following command:
# Replace <ENV_NAME> with the name of your environment
conda activate <ENV_NAME>
Install a package by running the following command:
# Replace <PKG_NAME> with the name of the package you want to download from your channel
conda install <PKG_NAME>
If necessary, you can delete the environment by running the following command:
# Replace <ENV_NAME> with the name of your environment
conda env remove --name <ENV_NAME>
Additional conda commands
The conda info command provides information about the currently active environment (including the location of your .condarc file).
The conda --help command provides a list of available arguments, brief descriptions of their functions, and a list of additional commands from other packages.
This conda cheat sheet contains a list of common conda commands and brief explanations of their functions with examples.